Olympia London
End-User Guide

Signing Up as a New User

To sign up as a new user, click the green ‘First Time User’ button on the log in page. Fill in your details, agree to the terms and conditions, and click ‘Register’. You will only be able to click the register button if you’ve filled in all of the required fields.

While events were offline, we moved to a new server, so all users must sign up to the new website:


olympialondon.voyagecontrol.com

Logging In

Enter your email and password and click the Log In button.

Forgot Password

If you have forgotten your password, click the blue ‘Forgot Password?’ text underneath the log in screen. If you get an error message, please ensure that you have signed up to the new server first. If you have signed up but still can’t log in, then click the green Support button to contact us - please include any screenshots or details of error messages when contacting Support.

How to Book

1. Click on ‘+ Make a Booking’ and select an ‘Event

2. Select your user type (e.g. Official Contractor or Shell Scheme from the predefined in the dropdown list)

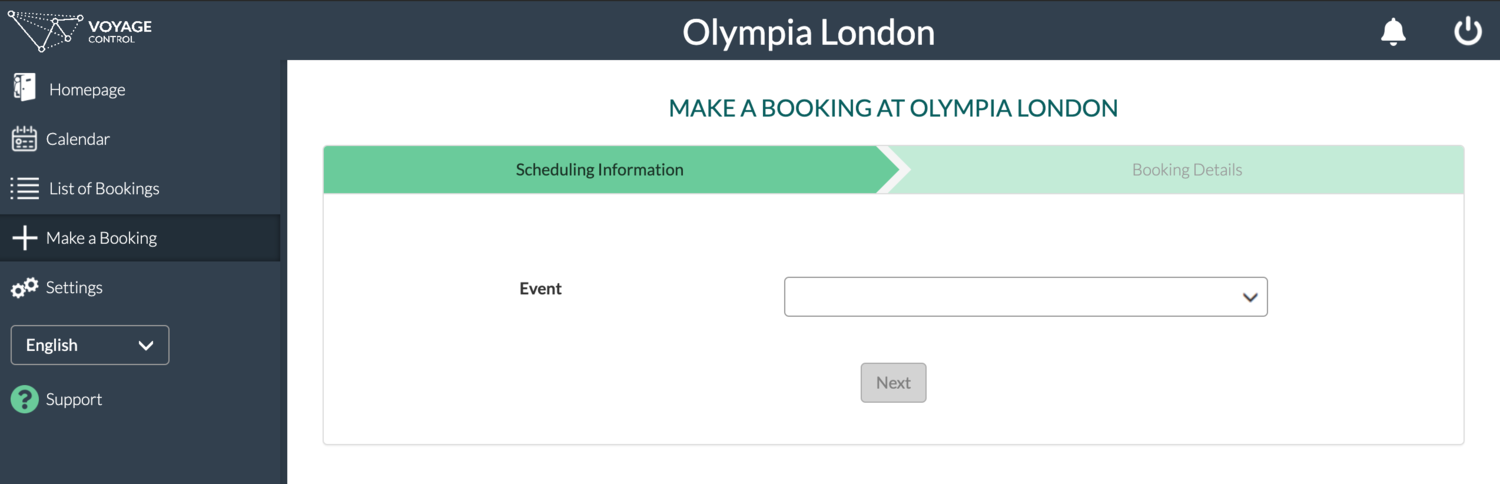
3. Select the phase (e.g. Build or Breakdown), the date you need to book for, the location of your event, and your vehicle type

A zone map is often displayed on the first page (in step 1) but if you are not sure of your zone please contact the event organiser


4. Next, click ‘Get Times’. A pop up will then appear with available time slots, click the time that you would like to arrive at the venue – if a time is not available, it will be greyed out. If you get an error message, please select a different day before contacting support.
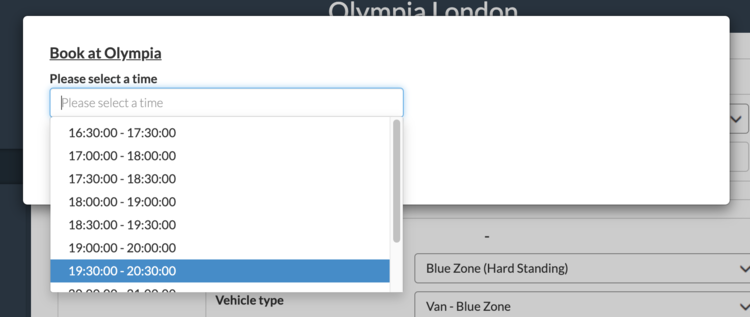
5. Click Next


6. Add in details of who you are delivering to, as well as the driver and vehicle All the information boxes on this page will need to be filled in order to complete the booking (if you do not know the driver or vehicle registration at this time, please select the tick box to indicate so)

7. Please ensure that you select the driver from the dropdown after you entered the driver details in the pop up Tick the box to agree to terms and conditions (this is a mandatory field) Once finished, click ‘Submit Booking’


8. You will then get a summary screen with some rules about your booking and you will receive an email and booking pass. You can also view your bookings and display your pass (or QR code) via the Voyage Control mobile app.

Important: Please ensure that the vehicle pass or QR code required for access to the venue is given to the driver of the vehicle as it will be scanned upon arrival.

How to View Your Bookings

You can view your bookings in ‘List of bookings’ from the left sidebar. You can search for your booking by searching your booking code or email in the top-right search bar. When searching, please ensure that the date range is correct.


Click on the booking to view the information, as well as see the Edit and Cancel buttons for that specific booking.

How to Edit Your Bookings

Click on the booking you want to edit. Your booking information pop up will appear.

  • To just adjust the driver, click Edit next to the driver section

  • To adjust the VRN, click on the red VRN text

  • To adjust times, locations, or other information:

    • Click on the green edit button in the top-right corner of the pop up to edit your booking information.

    • This will take you through the booking process again, where you can adjust what you need to.

    • Submit your booking to register your changes

How to Cancel Your Bookings

Cancel 1 booking:

  • Click on the booking you want to cancel. Your booking information pop up will come up. On this screen, click the Cancel Booking button. A pop up will appear to confirm your cancellation.

Cancel multiple bookings:

  • Click the tick box next to the bookings you want to cancel on the list view. Click the green Cancel Bookings button. A pop up will appear to confirm your cancellation.

Support

Click the green Support button or email support@voyagecontrol.com if you have any other questions.

arrow_upward